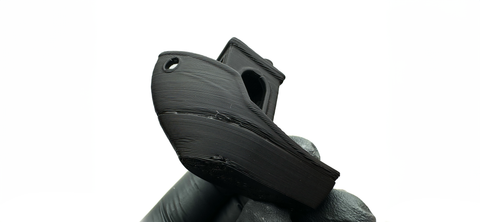
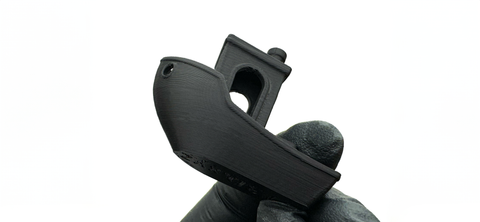
3D printing, although accessible to home hobbyists, is a professional manufacturing process that requires a thorough understanding of FDM technology and materials.
Optimal printing results require adjusting settings for each specific filament material and printer model.
Tested on Bambu Lab X1C (0.4 Nozzle):
Speed: 300mm/s - Nozzle: 225 - Bed: 60 - First layer: 20mm/s
Using Bambu Lab Slicer?
Download Bambu Lab Slicer Configs file by Thomas L.
Or try this step by step instruction to import various print profiles for Bambu Lab:
- Download the Profile – Click the link below to download the .bbsflmt file.
- Open Bambu Studio – Launch Bambu Studio on your computer.
- Import the Profile – Go to File → Import → Import Configs and select the downloaded file.
- Apply the Settings – After importing, choose the ATA PLA 2.0 profile in your slicer settings for optimal print results.
👉 Download ATA PLA 2.0 @Bambu Lab A1 0.2 nozzle.bbsflmt
If you experience any issues, feel free to contact us. Happy printing! 🚀
Found better settings? Share and win free filament!
Disclaimer: ATA® provides suggested 3D filament settings based on community feedback. Results may vary; user discretion is advised.
Get started with ATA® PLA 2.0
Calibrate new filament

Troubleshoot Printing Problems
- Clean the Bed: Use isopropyl alcohol for a residue-free surface.
- Adjust Bed Temp: Usually a hotter bed will help the filament stick more to the bed.
- Apply Adhesives: Use glue stick or hairspray for extra grip.
- Level the Bed: Ensure it's evenly leveled for uniform adhesion.
- Use Brims or Rafts: Increase the adhesion surface with slicer settings.
- Optimize First Layer: Slow down the speed and increase extrusion for the first layer.
- Choose the Right Surface: Experiment with PEI, BuildTak, or glass beds.
- Use a Heated Bed: Increasing the bed temperature can help the first layers of the print stay warm and reduce warping.
- Apply Bed Adhesives: Use glue sticks, hairspray, or dedicated 3D printing adhesives to improve bed adhesion.
- Use a Brim or Raft: Adding a brim (a wide outline around your print) or a raft (a platform under your print) can increase the adhesion surface and reduce warping.
- Level the Print Bed: Ensure the bed is properly leveled and the nozzle height is correctly adjusted to improve first layer adhesion.
- Optimize Printing Temperature: Adjust the printing temperature to ensure that the filament is extruded smoothly and adheres well to the bed.
- Control Ambient Temperature: Printing in a controlled environment, free from drafts or sudden temperature changes, can reduce warping.
- Choose the Right Material: Some materials are more prone to warping than others. Consider using filaments designed to minimize warping.
- Adjust Cooling Fans: Reduce cooling fan speed for the first few layers to prevent rapid cooling and contraction that can lead to warping.
- Retraction: Increase retraction speed or distance.
- Lower Temperature: Decrease the nozzle temperature.
- Faster Travel: Speed up non-printing movements.
- Dry Filament: Ensure filament is moisture-free.
- Temperature Tower: Test to find the optimal print temperature.
- Combing Mode: Keep travel moves within the print area.
- Coasting and Wipe: Stop extrusion early and move nozzle to reduce oozing.
- Adjust Belt Tension: Ensure belts are neither too tight nor too loose.
- Lubricate Movement Parts: Keep rails or rods lubricated for smooth movement.
- Remove Obstructions: Clear anything blocking the print head or bed path.
- Reduce Print Speed: Lower speed to reduce stress on the printer's mechanics.
- Secure Pulleys: Check that pulleys on motors are tightened properly.
- Increase Motor Power: If possible, slightly up the current to stepper motors.
- Update Firmware: Keep your printer's firmware updated for optimal performance.
- Level the Bed: Ensure the printing bed is properly leveled.


